3D Design and Modeling
Engineering is an integral part of designing both the kite and the aeropods themselves.
When designing a kite, there are a lot of components that come into play, primarily aerodynamic forces. A variety of factors, including weight, dimensions, curvature, etc, influence a kite’s aerodynamics. Several different kites can be built at home to become acquainted with the forces that act on them during flight. It’s possible to construct low-cost and functional kites using a sewing machine and Tyvek material. Similarly, one could make miniature kites using tissue paper that fly as well as larger kites, but with a much smaller wind velocity that can be generated just by waving an arm back and forth. The benefit of building a kite from scratch is its affordability, as well as the ability to customize and alter the kite for improved performance.
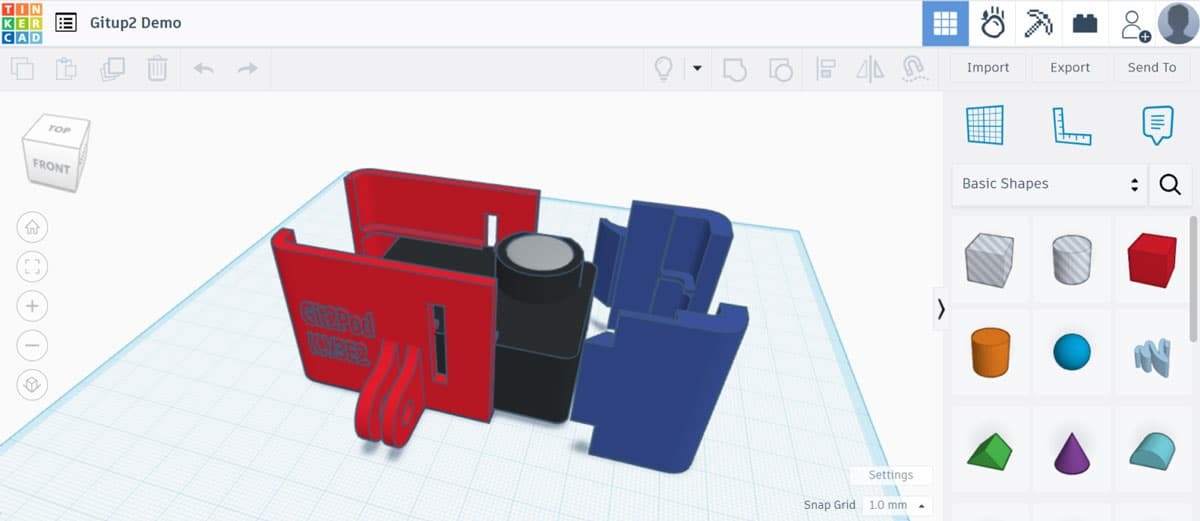
The aeropod is designed to carry instrumentation and fly stably beneath a kite. On the front end is the mount for the instrument that both holds the instrument in place and protects it in case the aeropod falls. On the back end are perpendicular fins that keep the aeropod directionally oriented with the wind, as well as dampen the sway introduced by the wind. Lastly, in the middle of the aeropod is a pylon. The pylon is an adjustable part located at the center of gravity, allowing the kite to hang in balance and remain more stable during flight.
3D Printing
A 3D printer is a machine that draws in plastic filament and heats it to make it malleable, then lays down the filament in a pattern dictated by a 3D model file. When using a 3D printer, a student is exposed to a variety of engineering concepts, ranging from the mechanics of the 3D printer to the design and testing of 3D modeled parts. When designing aeropod parts, the primary concerns are weight, strength, and ease of printing. A successful 3D part is both strong and as lightweight as possible; it needs to be able to withstand the force of the aeropod falling out of the air, while also being light enough for the kite to lift relatively easily. It’s also essential to design the parts with other people in mind. Not everyone’s 3D printer is the same type or quality, and for everyone to be able to print an Aeropod, the parts must be easy to print with minimal changes to printer settings.
To design 3D parts, we primarily use the free and accessible software TinkerCAD, which can be accessed through a web browser. TinkerCAD offers a user-friendly introduction to a 3D design environment, introducing users to the concepts of engineering design, including overhang and printer settings.
Instrument Testing
Instrument testing is an integral part of the project as procurement availability and research interests change. During the testing process, various factors are taken into account to determine if the instrument is ideal for the project, including cost, accessibility, user-friendliness, and measurement precision.
A standard test involves operating new instruments alongside current ones to obtain a side-by-side comparison of data quality and determine if the quality is suitable for the price point. Similarly, it’s essential to verify that the instrument is user-friendly and can be used by various levels of technical users, or that the intricacies of the instrument can be laid out procedurally. Testing is an ongoing part of the project, as new instruments become available and others are discontinued.